I’m currently working on a project to provide secure connectivity from multiple locations to a centralized server in an organization’s headquarters. I contemplated using several firewall solutions, or building one using Debian. After building some containers on Alpine, I figured why not just use Alpine itself as the gateway with WireGuard. The setup was done on a QEMU Virtual Machine on Ubuntu 24.04. I’ll then move the VM to the devices on each premises to have an always-on, auto-connected virtual tunnel that is secure. This lightweight setup allows me to spin up a gateway that does what I need quickly and efficiently with minimal hassle.
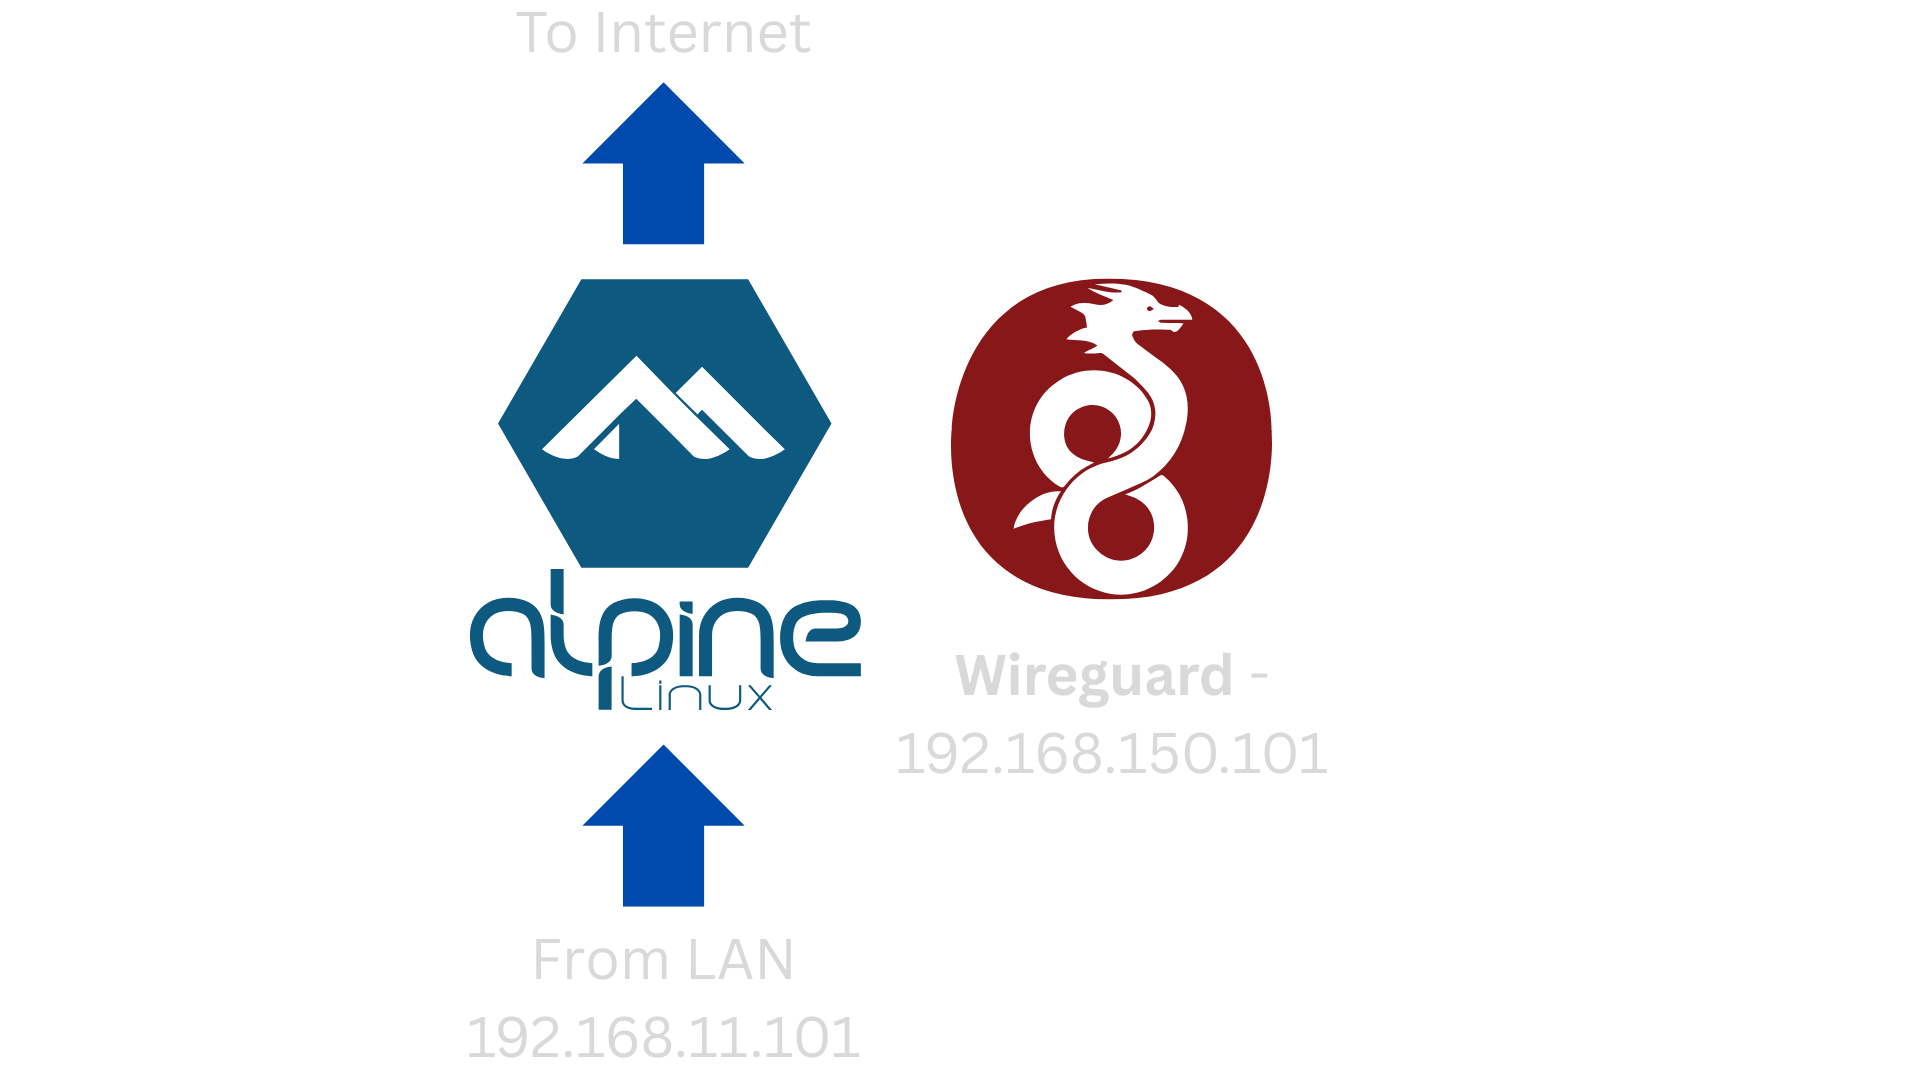
The Alpine Linux gateway will have two interfaces: one for the LAN (192.168.11.0/24) running dnsmasq with IP forwarding and NAT, and another for the public-facing internet. The internet connection will come from a provider via the same interface on the Virtual Machine (VM) host. Since the client is still deciding between Linux or Windows for the VM host, my VM must run flawlessly on both, without creating extra setup work for their maintenance staff.
Installing Alpine Linux
I am using Cockpit to perform the setup of the gateway so I can do the needful from the comfort of my laptop.
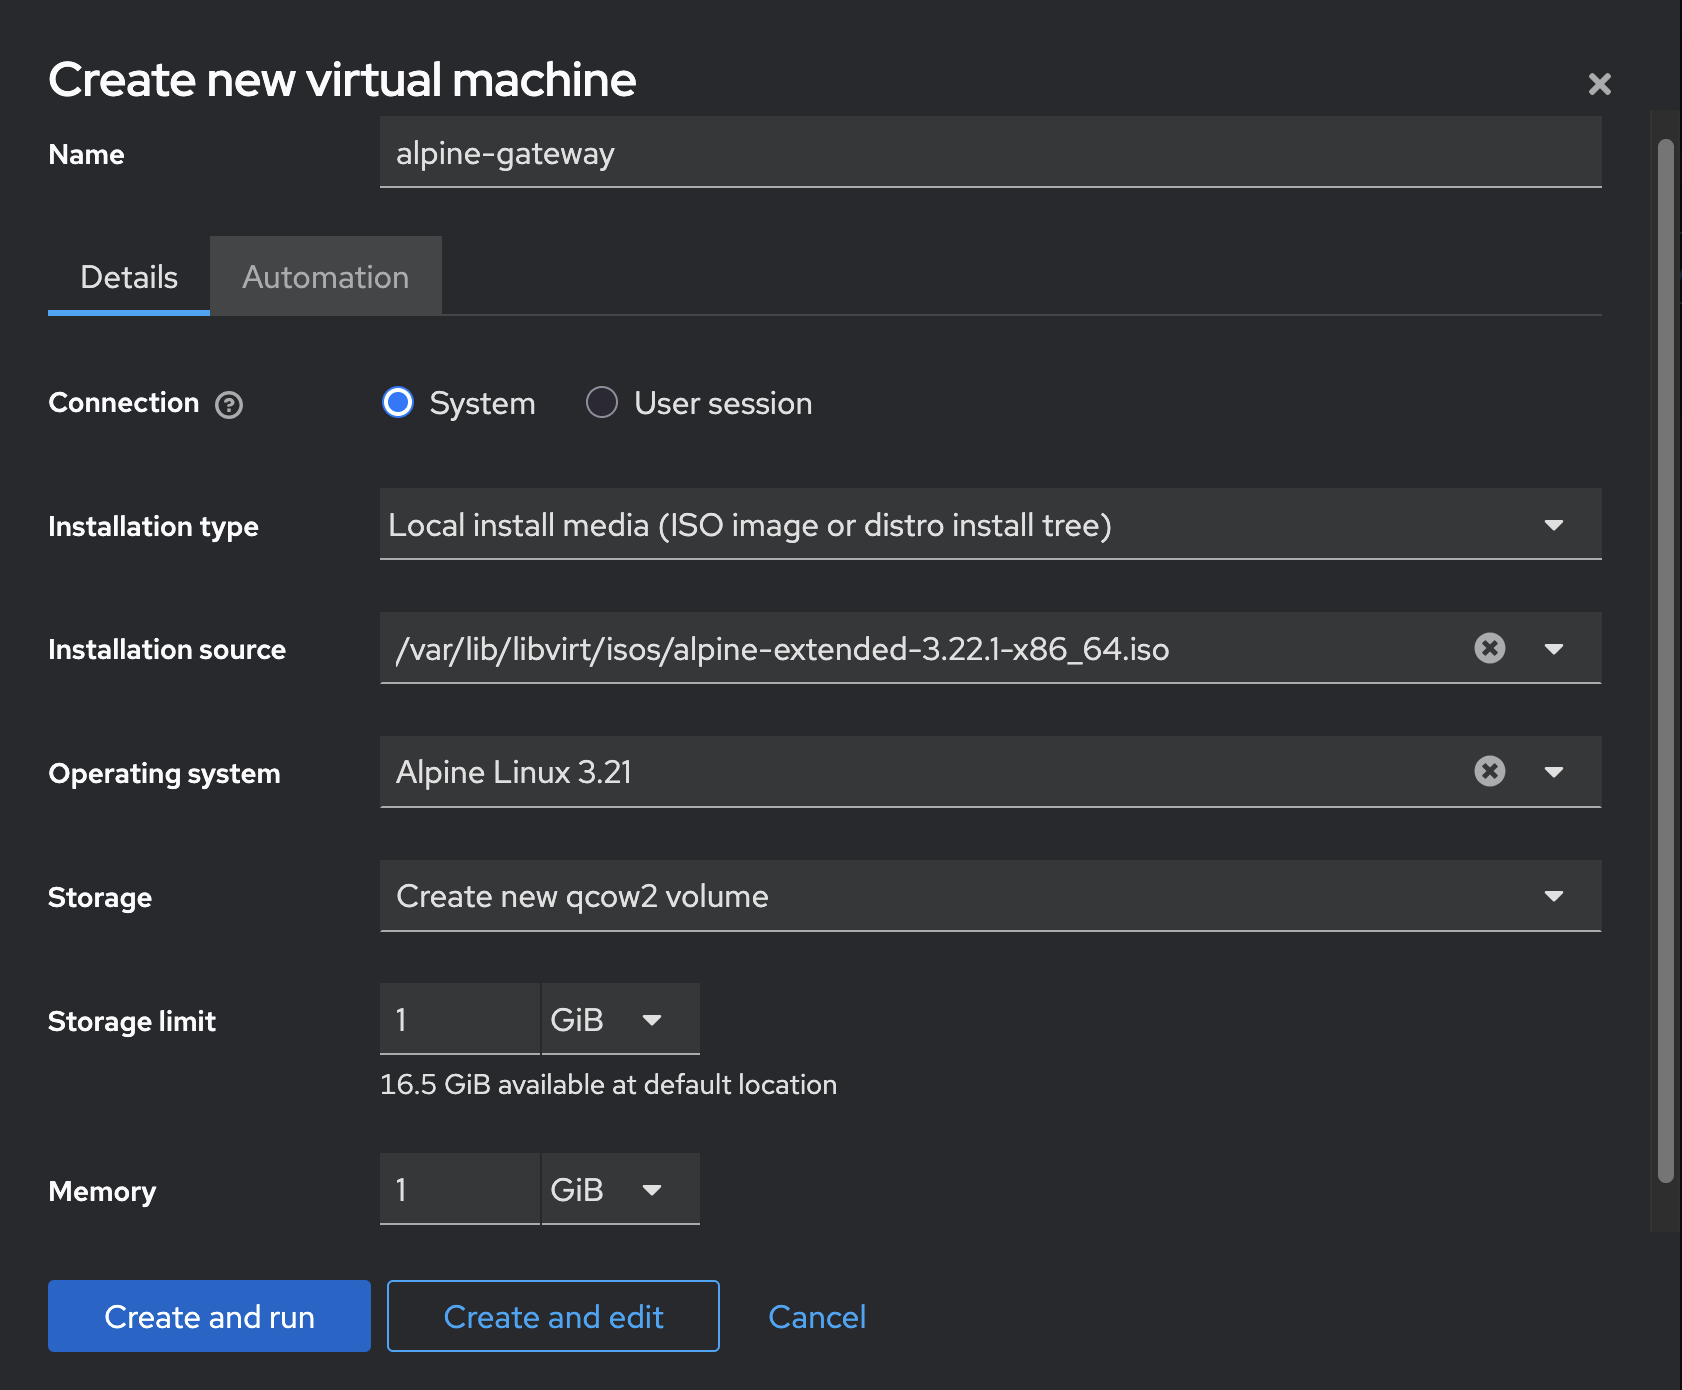
With the VM booted up, log in using the root user and run the setup-alpine script to prepare the system for installation. Take note of the following key items:
- Set a strong password for the
rootuser when prompted. - Create a new user to log in and manage the gateway.
- Choose
opensshas the SSH server for maximum compatibility. - Choose the correct disk and select
sysas the disk mode. This installsAlpineto disk like a regular OS, ensuring all changes are persistent.
The other configuration details are pretty self-explanatory. A reboot now uses the disk install of Alpine, allowing us to move on to the next step of the setup
Installing packages on Alpine Linux
After a complete reboot and logging in as the root user, the first thing I do is to enable the community repo in /etc/apk/repositories. After that, I run apk update && apk upgrade to make sure the new repo is added and the system is brought up to date. After this, I can install the necessary packages on Alpine.
apk add bash shadow micro dnsmasq iproute2 sudo nftables WireGuard-tools
I install the following packages right after enabling the community repo:
bash– I prefer it over the default BusyBox sh, so installing it gives me a familiar shell environment to work with.micro– My go-to text editor; I prefer it overvim, so it’s one of the first packages I add.dnsmasq– Needed to act as a DHCP server for the LAN, so we might as well install it early.shadow– Provides GNU user management tools likechsh,usermod, andpasswdwith more options than BusyBox. In this setup, it’s what lets me change a user’s shell without manually editing/etc/passwd.iproute2– Adds full-featured networking tools likess,ip link, andip routebeyond the BusyBox versions. I usessoften to check listening ports and services.sudo– Allows a normal user to run commands asrootor escalate privileges when needed.nftables– Modern packet filtering framework that replacesiptables. I recently started to use it in place ofiptablesand this is the firewall I’m leaning with for theAlpinegateway.WireGuard-tools– Provides thewgandwg-quickcommands to configure and manage WireGuard VPN tunnels, which will be the core of secure connectivity from this gateway.
chsh -s /bin/bash root
chsh -s /bin/bash user
Replace user with the username entered during installation. The remaining setup is done over SSH, so get the IP address of the VM using ip address show
By default root is NOT allowed to log in via SSH so the normal user we created will be necessary to log into Alpine.
This is my $HOME/.bash_profile for both user and root
[ -f ~/.bashrc ] && . ~/.bashrc

# Stop here for non-interactive shells
case $- in
  *i*) ;;           # interactive
  *)  return ;;     # non-interactive
esac

# ───── Color definitions ─────
RED='\[\e[0;31m\]'
GREEN='\[\e[0;32m\]'
YELLOW='\[\e[0;33m\]'
BLUE='\[\e[0;34m\]'
MAGENTA='\[\e[0;35m\]'
CYAN='\[\e[0;36m\]'
WHITE='\[\e[1;37m\]'   # bright white for typed commands
RESET='\[\e[0m\]'

# ───── Prompt (PS1) ─────
# Note: we *do not* RESET at the end so your typed command stays WHITE.
if [ "$EUID" -eq 0 ]; then
  # root: username red, host yellow, cwd blue, then type in white, end with #
  PS1="${RED}\u${RESET}@${YELLOW}\h${RESET}:${BLUE}\w${WHITE}# "
else
  # user: username green, host yellow, cwd blue, then type in white, end with $
  PS1="${GREEN}\u${RESET}@${YELLOW}\h${RESET}:${BLUE}\w${WHITE}\$ "
fi

alias ls='ls --color'
alias ll='ls -l'
alias vi='micro'
alias vim='micro'
Configure sudo to allow passwordless escalation
This next step is mainly for convenience so I allow my user to become root without password. This is NOT RECOMMENDED for a production environment, but I have it enabled for development and testing. It gets turned off before heading to production.
Using visudo make sure the following line exists, uncommenting it if it is commented out with a hash (#)
%wheel ALL=(ALL:ALL) NOPASSWD: ALL
Configure Alpine for gateway functionality
The first step in ensuring Alpine works as a gateway is to enable IP Forwarding. For this we create a file named /etc/sysctl.d/99-ip_forward.conf with the following contents
net.ipv4.ip_forward = 1
net.ipv6.conf.all.forwarding = 1
Next up is to configure a static IP address for the LAN interface for us to manage the LAN interface. For this, edit the /etc/network/interfaces file and configure the interfaces. The typical layout will be as follows
auto lo
iface lo inet loopback

auto eth0
iface eth0 inet dhcp

auto eth1
iface eth1 inet static
        address 192.168.11.1
        netmask 255.255.255.0
In this case eth0 uses DHCP so it can get the address from an upstream provider. If the address is static, modify the config to set a static address. eth1 on the other hand is the LAN-facing interface so we definitely require a static IP address.
Final step of the process is to configure dnsmasq to issue out IP addresses for the LAN portion. I created a file named /etc/dnsmasq.d/dhcp.conf with the following contents
#log-dhcp
#log-facility=/var/log/dnsmasq.log

# hardening
dhcp-authoritative
domain-needed
bogus-priv

# Listen only on LAN
interface=eth1
bind-interfaces
port=53            # enable DNS for clients
resolv-file=/etc/resolv.conf

# DHCP pool: .100–.200, 12h leases
dhcp-range=192.168.11.101,192.168.11.199,12h

# Gateway IP for clients
dhcp-option=3,192.168.11.1

# DNS servers handed to clients
dhcp-option=6,192.168.11.1
After saving this file, enable the dnsmasq service using rc-update add dnsmasq default.
WireGuard setup
For this, I use the WireGuard Peer
as a reference to setup the Alpine gateway as a WireGuard peer. The WireGuard server is running on an Amazon EC2 instance that generates peer configuration. With the configuration on hand, I write the contents of the file to /etc/WireGuard/wg0.conf
In Alpine, to auto-start wg0, we need to perform the following steps
ln -s /etc/init.d/wg-quick /etc/init.d/wg-quick.wg0
rc-update add wg-quick.wg0 default
rc-service wg-quick.wg0 start
Enable nftables firewall
Configuring nftables is pretty straightforward, and I can split up the rules for each component into its own file for easier reference. Enable nftables to start on Alpine boot up using rc-update add nftables default
NAT NFT rules
Create the file /etc/nftables.d/nat.nft with the following contents
table ip nat {
  chain postrouting {
    type nat hook postrouting priority 100; policy accept;
    oifname "eth0" masquerade
  }
}

table inet filter {
  chain input {
    type filter hook input priority 0; policy drop;
    iif "lo" accept
    ct state established,related accept

    # Allow DHCP on LAN
    iifname "eth1" udp dport 67 accept
    iifname "eth1" udp sport 68 accept

    # Allow DNS over UDP from LAN
    iifname "eth1" udp dport 53 accept comment "Allow DNS (UDP) from LAN"
    # Allow DNS over TCP from LAN
    iifname "eth1" tcp dport 53 ct state new,established accept comment "Allow DNS (TCP) from LAN"

  }

  chain forward {
    type filter hook forward priority 0; policy drop;
    # LAN → Internet
    iifname "eth1" oifname "eth0" accept
    # Internet → LAN (established)
    iifname "eth0" oifname "eth1" ct state established,related accept
  }
}
If your interface name for the LAN-facing is something other than eth1, replace it in the file above.
SSH NFT rules
Create the file /etc/nftables.d/ssh.nft with the following contents
table inet filter {
        chain input {
                tcp dport 22 accept
        }
}
If the SSH port is running on another port, replace the port number here.
WireGuard NFT rules
Create the file /etc/nftables.d/wireguard.nft with the following contents
table inet filter {
  chain input {
    # Allow incoming WireGuard
    udp dport 51820 ct state new accept comment "Allow WG on eth0"
  }

  chain forward {
    type filter hook forward priority 0; policy drop;

    # VPN → LAN
    iifname "wg0" oifname "eth1" accept comment "WG→LAN"
    # VPN → Internet
    iifname "wg0" oifname "eth0" accept comment "WG→WAN"

    # Internet → VPN (established)
    iifname "eth0" oifname "wg0" ct state established,related accept

    # LAN → VPN
    iifname "eth1" oifname "wg0" accept
    # VPN → LAN (established)
    iifname "wg0" oifname "eth1" ct state established,related accept
  }
}

table ip nat {
  chain postrouting {
    type nat hook postrouting priority 100; policy accept;

    # Masquerade VPN client Internet traffic
    oifname "eth0" masquerade comment "Masq WG→WAN"

    # masquerade LAN client traffic going out wg0
    oifname "wg0" masquerade comment "Masq LAN→VPN via WireGuard"
  }
}
The above rules allow traffic between the LAN (eth1) and VPN (wg0) which includes performing IP Masquerade over the VPN.
Now we can reboot the Alpine gateway and we should be able to ping the WireGuard tunnel endpoint from a client on the LAN side.
After rebooting, you can view the nftables rules using nft list ruleset
(Optional) - Custom Message of the Day (MotD)
I prefer to have a custom motd when I log in, purely for aesthetic reasons. To have it implemented in Alpine, I installed the figlet package and have this script located in
/etc/profile.d/10-banner.sh
#!/bin/sh
# Show a cyan ASCII hostname and a dim-white default IPv4/CIDR

# Only when attached to a TTY
[ -t 1 ] || return

HOST="$(hostname)"
# Figure out terminal width (fallback 80)
cols="$(stty size 2>/dev/null | awk '{print $2}')" ; [ -n "$cols" ] || cols=80

# Find default interface and its IPv4/CIDR
defif="$(ip route show default 2>/dev/null | awk '/default/ {print $5; exit}')"
if [ -n "$defif" ]; then
  cidr="$(ip -o -4 addr show dev "$defif" 2>/dev/null | awk '{print $4; exit}')"
else
  cidr="$(ip -o -4 addr show scope global 2>/dev/null | awk '{print $4; exit}')"
fi
[ -n "$cidr" ] || cidr="no IPv4"

# Colors
CYAN='\033[1;36m'
DIM='\033[2;37m'
RST='\033[0m'

# Print banner
printf "%b" "$CYAN"
figlet -w "$cols" "$HOST"
printf "%b" "$RST"
printf "%bDefault IPv4: %s (%s)\n\n%b" "$DIM" "$cidr" "${defif:-unknown}" "$RST"
Make sure to chmod 0755 /etc/profile.d/10-banner.sh so it can be read and executed during login.
(Optional) - Disable root login from terminal
Once I know everything is working, I disable root login by executing passwd -l root so no one can log in to the gateway from the terminal as root. The only way to log in will be to use the user account and then use sudo to escalate privileges.
Happy Alpine-ing.